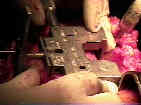
- Determine Appropriate AP Component Size:
- most instrument systems incorporate cutting block that is placed on end of femur & rotated to appropriate orientation;
- prior to inserting the AP sizing guide, remove any prominent meniscal remnants so that the posterior "fins" of the sizing guide can fully be seated;
- if there is any question that the sizing guide is not seating down properly, then perform the proximal tibial cut first and then reapply femoral cutting jig;
- when applying the femoral sizing stylus, but sure to remove all synovium between the stylus and the anterior femoral surface;
- remember that most systems offer sizes that go up in 4 mm increments, and therefore a small amount of synovium entrapped between the stylus and bone can very easily lead to oversizing the femoral component;
- distal femoral sizing guide is then selected (from template);
- if there is a significant mis-match between the templated size and the size determined from the sizing jig, remeasure the sizing jig, and make sure that it is fully seated;
- management of femoral / component mismatch
- there may be no perfect options for a measurement that lies inbetween component sizes;
- 3 options:
- 1) downsize and translate the component anteriorly
- if the proposed femoral cut lands between available sizes, then choose the lesser size and then to translate the component anteriorly to the point that the femoral cortex is not notched;
- for example, if the optimal size for the femoral component is a 3 1/2, then choose a size 3 and move the component midway between the standard positions for a size 3 and a size 4 femoral components;
- problem: there will be an increase in the flexion gap which can lead to instability and postoperative pain;
- 2) downsize and notch:
- concern with significant notching is suprcondylar fracture;
- downsizing may result in a raised joint line, an acquired patella infera and sequent post impingement against the patella in deep flexion;
- references:
- Post impingement in posterior stabilised total knee arthroplasty
- Right sizing of the femoral component in total knee replacement
- 3) choose the oversized component
- this can lead to increased patellofemoral forces, stiffness, and pain;
- ref: Upsizing the femoral component increases patellofemoral contact force in total knee replacement
- Rotational Alignment of AP Cutting Guide:
- AP axis method
- posterior femoral condyles as a rotational guide:
- axial alignment of the femoral component either is determined by posterior femoral condyles or is adjusted to provide equal collateral ligament tension w/ knee in flexion;
- 3 deg external rotation is typically utilized;
- some systems currently call for externally rotating femoral component 3-4 deg relative to posterior femoral condyles to aid in patellar tracking;
- pitfalls:
- femoral component is also commonly placed in excessive internal rotation, which sign affects patellar tracking;
- obviously, significant internal rotation should be avoid to prevent increasing the Qangle;
- in some cases, there will be a larger AP size of lateral femoral condyle than medial condyle, and in this situation it may not be possible to rotate the femoral cutting guide externally in order
to avoid undercutting anterior cortex
Assessing rotational alignment in total knee arthroplasty.
Malrotation associated with implant alignment technique in total knee arthroplasty.
Varus tibial joint line obliquity: a potential cause of femoral component malrotation.
Right sizing of the femoral component in total knee replacement
Overhang of the Femoral Component in Total Knee Arthroplasty: Risk Factors and Clinical Consequences


........................................................................................................................................................................................................................................................................................................................


